Educated Guesses Educator’s Page

Educated Guesses: Educator's Page
A LESSON IN DRAWING YOUR OWN INFORMED CONCLUSIONS ABOUT NATURE
INTRODUCTION
Educated Guesses: Teaching Students How to Think When Answers Are Easy
In today’s classrooms, answers are everywhere—and increasingly instantaneous. Students can look up facts in seconds, and AI tools can generate polished responses just as quickly. Yet many educators are noticing a growing challenge: when answers come easily, students often struggle with the thinking that should come before them.
Educated Guesses is a thinking exercise designed for a world where answers are easy—but understanding is not.
This lesson intentionally shifts the focus away from being “right” and toward how students arrive at conclusions. It emphasizes observation, research, hypothesis-building, and evidence-based reasoning rather than speed or correctness. An educated guess is not an opinion; it is a reasoned conclusion supported by available information.
Importantly, this activity is meant to slow students down on purpose. That may feel counterintuitive in an era that rewards efficiency, but the pause is the point. Learning does not always happen at the speed of answers, and students benefit from structured opportunities to sit with uncertainty, test ideas, revise their thinking, and justify conclusions.
Educators using this lesson often find that it:
- reduces students’ anxiety about “getting it wrong”
- encourages deeper engagement with evidence
- supports claim–evidence–reasoning frameworks
- discourages copy-and-paste thinking
- remains effective even when students have access to AI tools
Students are evaluated not on whether their conclusion is correct, but on the quality of their reasoning:
- What did they observe?
- What information did they seek out?
- How did they connect evidence to their conclusion?
- What might change their thinking?
Educated Guesses supports scientific thinking, critical reasoning, and intellectual humility—skills that are increasingly essential in a rapidly changing information landscape. It also validates something many educators already know: productive struggle is not a failure of learning; it is a vital part of it.
For full descriptions of lesson topics and sample videos, go to the Educated Guesses Introduction page.
In “Physical Adaptation,” we explore the diversity of sizes, shapes, and types of nonhuman primates, as well as the ways in which they are “outfitted” to be successful in their ecosystems. We explore WHY they have developed these adaptations and HOW they benefit the primate species and their ecosystems. While doing so, students will learn about a variety of species and their habitats. There are a few bonus lessons as well, like why nonhuman primates may have multiple common names, but only one scientific name; the rules for writing scientific names (binominal nomenclature); and how biological orders are classified. It’s up to you, the educator, to determine how much of these bonuses you wish to bring to your students based on their ages, grade levels, and educational experiences.
See “Educator’s Notes” (below) for further information about primates’ names and wet noses vs. dry noses.
LIFESTYLE ADAPTATIONS
In “Lifestyle Adaptations,” we explore the diversity of nonhuman primate lifestyles and the physical adaptations that facilitate those lifestyles. We explore WHAT these lifestyle adaptations are, WHY they developed, and HOW they benefit the primate species and their habitats. We explore why their behaviors are designed for those habitats and how their bodies evolved to accommodate them. In this section, we explore types of diets, biological clocks (diurnal/nocturnal), locomotion, social grooming, and primates’ use of nature’s pharmacy.
See Educator’s Notes (below) for pointers regarding the “Nature’s Pharmacy: Self-Anointing lesson.”
Instructions for each lesson appear on the lesson’s page, along with videos, helpful hints, and insights.
Students are instructed to use a 5-step scientific method. See below.
You can modify the depth of research your students will undertake based on their ages and grade levels and by asking more or less complex questions within the topics.
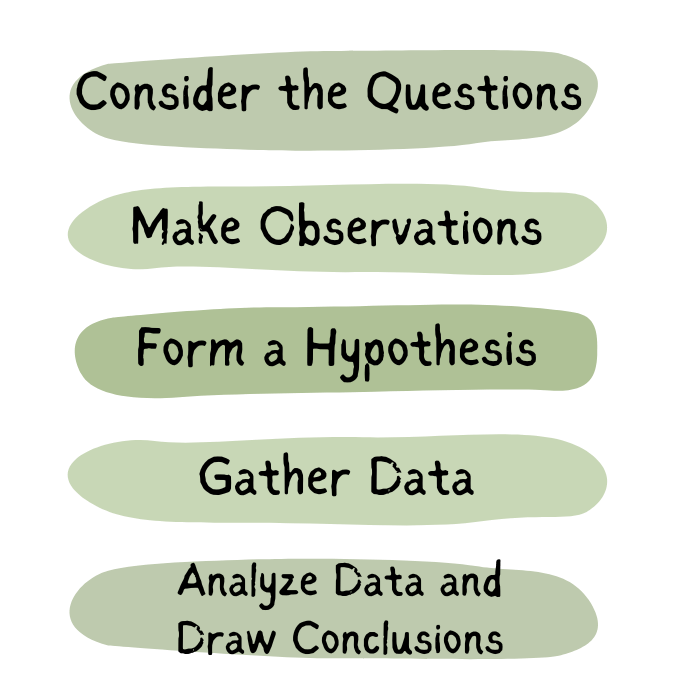
5-STEP SCIENTIFIC METHOD
1. Consider the Question or Questions in the Videos
2. Make Observations
3. Form Your hypothesis
- What’s your initial guess based on your observations?
4. Gather Data
- This is the research step
- Learn about the species in your hypothesis
5. Analyze Your Data and Draw Your Conclusion or Conclusions
- Test your hypothesis against what you learn
- Have you changed your mind? If so, why? If not, why?
ARE THERE RIGHT or WRONG ANSWERS?
As stated in the Introductions, all of these lessons are more about the process of discovery than whether there are right or wrong answers. HOWEVER, for some of the categories, there are, indeed right answers. It’s up to you whether your goal is for students to discover the exact correct answers. We’ll supply them to you so you can decide:
The largest primate is the Grauer's gorilla:
The Grauer’s gorilla is the world's largest primate, further distinguished from other gorillas by a stocky body, large hands, and a short muzzle. [Those other gorillas are Grauer’s subspecies cousin, the mountain gorilla, the Western lowland gorilla (gorilla gorilla gorilla), and the Cross River gorilla (gorilla gorilla diehli), each a subspecies of the Western gorilla (gorilla gorilla).]
Adult males weigh between 450 and 550 pounds (204–250 kg); however, giant-size male Grauer’s gorillas can weigh 600 pounds (272 kg) or more. Their maximum height is a towering 6 feet, 4 inches (1.95 meters).
Females weigh half as much as their male counterparts and stand only 5 feet, 3 inches (1.62 meters) tall or less.
The smallest primate is the Madame Berthe's mouse lemur:
The Madame Berthe’s mouse lemur is the smallest primate in the world. The average head and body length of adult males is just 4.6 inches (11.8 cm) and 5 inches (12.7 cm) for females. Their tails are longer than their bodies and measure approximately 5.1 inches (13 cm). Their ears measure around 0.7 inches (1.7 cm). On average these tiny primates weigh just 1.2 ounces (33 g). For perspective, that’s about a third of the weight of a regular-sized apple.
Females are sometimes heavier, on average, than males, but males fluctuate in weight and become similar to females in weight when the mating season approaches.
The largest monkey is the mandrill:
Mandrills are the largest monkeys in the world. Adult females (about 27 pounds/12 kg) tend to weigh two or three times less than males (about 70–119 pounds/32–54 kg), and usually measure roughly 22 inches (56 cm) to a male’s 32 inches (81 cm).
The smallest monkeys are pygmy marmosets:
With a body weight of 2–5 ounces (85–140 g) and a height of about 5 inches (13.6 cm), the pygmy marmoset is the smallest monkey. Pygmy marmosets are so small they are called “finger monkeys” because they can comfortably perch on a person’s finger. The skulls are tiny, between 1.3 and 1.5 inches (3.3–3.8 cm)—that’s about the size of an AirPod!
This might be a matter of opinion, but we believed that it's universally shared.
The male proboscis monkey has the most unusually large nose. Noses of adult males hang down over their mouths, and may even extend past their chins, exceeding 4 inches (10 cm) in length and reaching up to 7 inches (17.5 cm). These large noses are used in sexual displays and as amplifiers, producing loud honking calls. Although female noses are substantial compared to other primates, they are considerably smaller in relation to the noses of adult males and are slightly turned upward. At birth, the noses of both males and females are more typically monkey-like in size, and they develop into their signature larger noses as they mature.
The snub-nosed monkeys have the most unusually small noses. There are five snub-nosed monkey species. Each has a similar nasal structure. Their namesake is derived, in part, from their flattened upward-turned noses with wide upturned nostrils that are deprived of nasal cartridge and sit back from the muzzle. Two flaps of skin sit above the high-arching nostrils; while the purpose of these flaps is not fully known, some theories suggest they may aid in protecting against frostbite during the long, cold winters.
Which primates have wet noses and which have dry noses are pretty well described within the lesson.
Anthropoid primates—that is great apes, small apes, and monkeys—have dry noses. In general, we anthropoids rely on visual and auditory senses more so than olfactory ones. Compare our sense of smell to that of cats or dogs, both of which have moist noses to enhance their ability to detect smells. Being primarily visual, we don't need wet noses as much as we need sharp binocular vision.
For the most part, prosimian primates have wet noses. They rely more on their sense of smell and having moist noses increases their olfactory reception. Many—but certainly not all—prosimians are nocturnal. You can see how a sharp sense of smell would be beneficial to them.
One of the things that you can count on in Nature is that there are exceptions to every rule. For example, night monkeys are nocturnal but, being monkeys, they do not have wet noses. For another, many lemur species are diurnal but still have wet noses. Now, here's the big exception, tarsiers are nocturnal prosimians AND have dry noses. This created a controversy among scientists regarding whether tarsiers should be categorized as monkeys or prosimians, regardless of the fact that everything else about them is prosimian in nature. The controversy continues. The solution, for the time being, is the division of the biological order "Primates" into the two categories discussed in this lesson:
- Strepsirrhini or wet-nosed primates
- Haplorhini or dry-nosed primates
Strepsirrhines, also called the wet-nosed primates, include prosimians like the galagos (also called bushbabies) and pottos of Africa, the lemurs of Madagascar, and the lorises of Southeast Asia. In general, strepsirrhines tend to be nocturnal, have larger olfactory centers in the brain, and exhibit a smaller size and smaller brain than apes and monkeys.
Haplorhines, or dry-nosed primates, include tarsiers, monkeys, and apes. Haplorhines, with a few exceptions, are diurnal (active during daylight hours), and depend more on their vision than their sense of smell. This should give you a hint into one of the benefits of having a wet nose—an enhanced sense of smell—that primates who rely on their vision do not need as much for survival.
This lesson has quite a few potentially captivating twists and turns for students. We think it could be fun. But we're primate geeks! 😉
Fun Fact: Another interesting difference is that strepsirrhines have the enzymes for making vitamin C, while haplorhines have to get it from their food. Eat your oranges!
NOTES REGARDING SPECIES’ NAMES:
How to name species can get complicated. It’s not always as straightforward as, say, identifying a monkey as a rhesus macaque. Many species have multiple common names. In some very confusing cases, some species even share common names!
Here’s an example, the ashy red colobus is also called the Ugandan red colobus. When doing research outside of this website, it’s best to look under both names.
A rather extreme example of this is the white-tailed titi monkey, which has an alternate common name, the red titi monkey. Here’s the confusion. The coppery titi also has an alternate common name, the red titi monkey.
What happens when species have multiple common names or share common names? Scientific names, which are written in Latin, clear up the confusion. The scientific names do not vary. That is, there are no alternate scientific names.
We’ve added the buttons below to the Instruction. We’ll leave it up to you to decide how deeply you want to delve into this subject matter based on what you know about your students, how old they are, or how confusing this might be for them. The information is there, but it’s for you to decide whether or not you find it appropriate to use it with your students. Are you okay with them identifying species with their common names only? Do you want to take it up a notch and have them identify the scientific names as well? Our goal is to keep it fun and to keep them focused on the 5-step scientific method so they can logically think through the exercise. You determine whether or not nomenclature is a distraction or an “extra points” benefit.
Click the button to the left below to find out why species have both common names and scientific names. Click the button on the right, below, to learn how species’ names are written.
Common names are not officially defined. They are based on everyday conversational language and may differ by country, region, profession, community, or other factors. As a result, it is not unusual for a species to have more than one common name.
Scientific names are in Latin and they are written in italics. They are standardized and for everyone, no matter what language you may speak. They are bound by a formal naming system, called binominal nomenclature, that has strict rules. Scientific names prevent misidentification. Those names only change if a species, or its genus, is officially redesignated by experts.
Naming living organisms is called "binominal nomenclature."
Common names are generally not capitalized, except as required because they include a person's name or a place, or because the name starts a sentence. If the name does not include a person or place, it will look like these examples:
ring-tailed lemur, common woolly monkey, or rhesus macaque.
If parts of the common name are based on a place or person's name, it might look like these examples:
Delacour's langur (person), Mt. Kilimanjaro guereza (place), or Barbary macaque (place)
Scientific names have very specific rules. First, there are two parts to the name: the genus and the species. Second, both parts of the name are italicized. And third, only the genus name is capitalized, even if the species name is a person or a place.
Example: the scientific name for the ring-tailed lemur is Lemur catta, the common woolly monkey is Lagothrix lagotricha, and the rhesus macaque is Macaca mulatta.
If the species name includes a place or person, that portion of the is still NOT capitalized since it's the species.
Example: The Delacour's langur is named for Jean Théodore Delacour, the first western scientist to encounter the species. Its scientific name is Trachypithecus delacouri. The Latinized version of Delacour is "delacouri" and it is NOT capitalized.
The exception to these rules (and there are always exceptions) is if you're naming a subspecies. Then there are three parts to the name: the genus (capitalized), the species (not capitalized), and the subspecies (not capitalized). All are italicized:
Example: The western lowland gorilla, Gorilla gorilla gorilla, is a subspecies of the western gorilla, Gorilla gorilla.
NOTES FOR THE SELF-ANOINTING LIFESTYLES:
We recommend this exercise for older students. Many of the articles about this topic are in academic papers. They are readable but require higher reading aptitude than lower grade levels. They can discover some information regarding this subject in our Primate Species Profiles, but for the purposes of using the 5-step scientific method, they should do more extensive research via the internet. They can double-check themselves in the Primate Species Profiles, but the profiles might not address self-anointing using that specific terminology.
We have not created lessons for the topics listed below, but they are among those that we brainstormed and selected from. We thought we’d list them here in case you’d like to develop your own lessons based on these topics. Who knows—we might add a few of these in future. If you see one that you’d like us to develop, shoot us an email at the address listed at the bottom of this page.
OTHER POTENTIAL TOPICS FOR PHYSICAL ADAPTATIONS:
- Flexible feet: Primate feet and their dexterity
- Bulbous bellies and poofy pouches: Sacculated stomachs, specialized salivary glands, and cheek pouches
- A tale of tails: Prehensile tails, non-prehensile tails, partially prehensile tails, long tails, short tails, no tails
- Venomous primates? Really? A slow loris’s only protection
- Loud calls: Howler monkeys and the hyoid bones that make them the loudest land mammals, gibbons and their songs, other loud callers
- Colorful coats, like red-shanked douc langur… or not so much like long-tailed macaques, including infant langurs being born different colors than adults—some bright golden, some white or striped
- Tooth combs? Who has them? Why?
OTHER POTENTIAL TOPICS FOR LIFESTYLE ADAPTATIONS:
- Family: Large troops/small family groups/complex fission-fusion societies
- The dating game: monogamy, polygamy, and many more mating styles
- Living in layers: Terrestrial/arboreal/both
- Horizontal leapers/vertical leapers/non-leapers
- Shared latrines: A lemur-specific lesson
Recommended Grade Levels for Educated Guesses
What makes Educated Guesses unusually strong is that it scales cognitively without changing its core premise. It’s the same thinking skill—reasoning under uncertainty—expressed at different levels of sophistication.
Why Educators Use This Lesson
- Encourages deeper thinking rather than answer-chasing
- Reduces anxiety around being “wrong”
- Supports scientific reasoning and critical thinking standards
- Works well in classrooms where technology is available
- Reinforces that learning happens through process, not immediacy
Learning Goals Across Grade Levels
Students will:
- practice making observations before drawing conclusions
- distinguish between opinions and evidence-based reasoning
- develop hypotheses and test them against available information
- explain how they arrived at an answer, not just what the answer is
- build confidence thinking through uncertainty without fear of being “wrong”
This lesson emphasizes thinking as a process, not speed or correctness.
Recommended for:
Grades 4–12 (with adaptations by grade level)
Educated Guesses is designed to grow with students. While the core idea remains the same—developing reasoned conclusions based on evidence—the depth of thinking and explanation naturally increases as students mature.
Teaching Notes by Grade Ranges
Upper Elementary (Grades 4–5)
Focus: Observation and inference
At this level, students learn to:
- notice details
- ask “why” and “how”
- support ideas with simple evidence
Educated Guesses helps students understand that a guess can be thoughtful and informed—not random. The emphasis is on what students observe and how those observations shape their thinking.
Grades 4–5 (upper elementary)
- Focus: Observation → inference
- Strengths at this level:
- Curiosity is still outward-facing
- Students enjoy “figuring things out”
- Less fear of being wrong
- How it lands:
- Concrete reasoning
- Short justifications
- Heavy emphasis on what do you notice?
- This is where the term “educated guess” feels empowering rather than threatening.
Middle School (Grades 6–8)
Focus: Hypothesis-building and evidence
Students begin to:
- connect multiple pieces of information
- test ideas against facts
- revise thinking when new information appears
This is a particularly strong age range for the lesson. It helps students navigate growing discomfort with uncertainty and reinforces that changing one’s mind based on evidence is a strength, not a failure.
Grades 6–8 (middle school)
- Focus: Hypothesis → evidence
- Strengths at this level:
- Beginning abstract thinking
- Growing ability to connect ideas
- Challenges:
- Increasing fear of being wrong
- Desire for certainty
- Why the lesson matters here:
- It explicitly separates guessing from opinion
- It normalizes uncertainty
- This is a sweet spot for the lesson.
High School (Grades 9–12)
Focus: Claim–evidence–reasoning
Older students are encouraged to:
- articulate and defend conclusions
- evaluate the strength of evidence
- recognize limits of available information
- reflect on what might change their conclusions
At this level, Educated Guesses supports critical thinking skills that remain valuable even when answers are easily accessible online or through AI tools. The lesson emphasizes reasoning, synthesis, and intellectual humility.
Grades 9–12 (high school)
- Focus: Claim → evidence → reasoning
- Strengths:
- Capacity for complex reasoning
- Ability to hold competing explanations
- Challenges:
- Performance anxiety
- Overreliance on “right answers”
- AI / Google shortcuts
- Why the lesson is especially relevant:
- It resists answer-chasing
- It aligns perfectly with AI-resilient thinking
- It reframes uncertainty as intellectual maturity
- At this level, it becomes almost philosophical without needing to say so.
Lesson developed by Debra Curtin, 2023, Revised 2025
For questions or comments, e-mail us at info@neprimateconservancy.org.